When facing garage roof issues, it’s essential to contact a reputable roof repair company. They have the expertise to diagnose and address the problem effectively, ensuring your garage remains protected. Whether you’re considering how to fix a garage roof or seeking a garage roof replacement near you, their guidance is invaluable. If the damage is minor, knowing how to repair a garage roof might save you money and extend the roof’s lifespan.

Simple repairs and inspections can be passed with a DIY project at times. However, for more extensive issues, consulting professionals is advisable to ensure a long-lasting and reliable solution. Trusting experts in roof repair ensures your garage roof is in capable hands, providing lasting security. Figuring how best to fix garage roof issues that arise can be a challenge and a rather intimidating task to take on yourself.
You can spend hours searching online and everywhere else to find ‘the best garage roof replacement near me’ or you can call your local roofing company. They can get you in touch with roofers who know roofing systems inside and out. They can help you find the services you need and ensure your garage roof system is in tip-top shape. Leaving roofing work in the hands of the pros will ensure your roof survives the seasons and is ready for whatever is ahead.

A garage roof isn’t different from the rest of your house roof unless the garage is detached from the rest. You’ll know you’ve got a leaking garage roof if you notice a slight smell or dampness after a downpour. You’ve got a leak if you see damp patches with a brownish tinge inside your garage.
Check the roof to see if there is standing water, ridges, or hollows. Also, look for dried joints or lifts near the roof flashing. You can fix garage roofs with simple, fast, no-flame remedies for emergency leaks to buy some time before undertaking major roof repairs. However, contact a garage roof repair service if the damage on your roof is more extensive.
You can perform a temporary garage roof repair job by waterproofing it with a liquid rubber membrane or a more commonly available fiber-reinforced acrylic sealant. If it’s your first attempt, follow a how-to repair a garage roof tutorial online. Before application, for better results, ensure your roof is clean and dry no matter what it says on the side of the tin.
For thorough repairs, let your local residential roofing contractors do what they do best. They have experience in this sort of thing, and letting them handle it is the surest way to get the garage roof fixed.
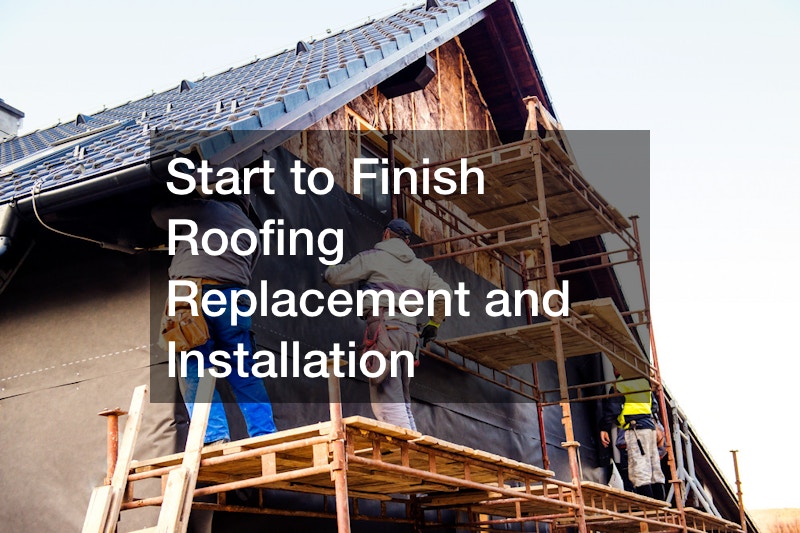
Protecting your home and loved ones from the elements is a top priority, and your roof plays a vital role in ensuring their safety and comfort. But over time, roofs wear out and may require replacement or repair. When the time comes for contacting roofers for a roofing replacement and installation project, it’s crucial to have a good grasp of the process to achieve a successful and long-lasting outcome.
That’s where this article comes in: we’ll discuss the process of start to finish roofing so you can have a good understanding of how to replace your roof yourself or with the help of a reliable roofing contractor and roofing services. Once you’re done reading the advice shared here, you’ll know exactly how to tackle your roof repair project.
Assessment and Planning

To get your roofing installation underway, it’s best to reach out to your local roofing repair services. They’ll gladly send over a friendly and experienced roofing contractor who will carefully examine your current roof. Their goal is to identify any damage, leaks, or structural concerns that may exist. Taking into account important factors such as the type of roofing material, the age of your roof, and the unique climate conditions in your area, the roofing contractor will offer valuable recommendations. These recommendations will include suitable replacement materials, estimated costs, and an anticipated timeline for the project’s completion.
By relying on the expertise of these professionals, you can ensure that your roofing installation is in good hands. They’ll provide you with the information you need to make informed decisions and guide you throughout the process, ensuring a successful outcome.
Material Selection
After the assessment of your roof is done, it’s time to dive into the exciting part – choosing the perfect roofing material for your home! There are plenty of options to explore, ranging from residential roofing shingles made of asphalt or metal to elegant tiles or timeless slate.
When making your decision, there are a few important factors to keep in mind. First, consider the durability of the material and how well it can withstand the elements. Next, think about energy efficiency and how the roofing material can help you save on heating and cooling costs. Of course, aesthetics play a significant role too – you want your roof to enhance the overall look of your home. And, of course, your budget is a crucial factor in the decision-making process.
Luckily, you won’t have to navigate this alone. Your roofing contractor and roof metal decking companies are here to guide you through the options and provide expert advice. They’ll take into account your specific needs and preferences, ensuring that you make an informed decision that perfectly aligns with your requirements. With their help, you’ll find the ideal roofing material that not only protects your home but also adds a touch of beauty to it.
Obtain Permits and Approvals

Before diving into your exciting start to finish roofing project, it’s essential to take a moment to check and comply with local regulations. Securing the necessary permits and approvals is a crucial step that shouldn’t be overlooked. But don’t worry, professional roofing contractors are well-prepared for this task! These knowledgeable experts are familiar with local building codes and regulations, making them the perfect guides to ensure everything is done by the book. They’ll take the lead in handling the permit process, ensuring that all legal requirements are met.
Prepare the Site
Now that you’ve got your permits secured, it’s time to let the roofing contractors work their magic! They’ll start by preparing the site for the installation process, and it’s an important step to ensure everything goes smoothly. First things first, the old roofing material will be carefully removed. This gives the contractors a chance to inspect the underlying structure for any signs of damage or rot. Don’t worry though, they’ve got you covered! If any repairs are needed, they’ll take care of it, ensuring a sturdy foundation for your new roof.
Proper site preparation is the key to a successful installation. It sets the stage for a fresh start and paves the way for a seamless roofing project. If you need guidance on how to prepare your roof for this exciting endeavor, don’t hesitate to reach out to your local roofing companies. They’ll be more than happy to share their expert advice and help you get everything in order.
Remove Old Roofing System
The first official step of your start to finish roofing project is to remove your home’s previous roofing system. When it comes to replacing your roof, there are several components involved. These include shingles, old metal flashing and drip edging, underlayment, and roofing nails or staples. It’s highly recommended to take precautions and use a tarp to protect your home’s exterior from debris and prevent your lawn from getting littered.
While it is possible to install new shingles over the existing ones, this can result in a less stable and secure roofing surface. For a better outcome, you’ll need to use a roofing shovel to carefully remove the current roof material and dispose of it in a roll-off dumpster bin. Removing old material can be one of the more challenging aspects of the job. If you don’t feel confident in your DIY skills, it’s a good idea to consider hiring a professional for this step, at the very least. They can ensure the job is done properly and minimize any potential risks.
Installation

Now comes the exciting part of your start to finish roofing project and the installation process! It all starts with the underlayment, an extra layer of protection against water penetration. The roofing contractors, who have plenty of experience under their belts, will follow the manufacturer’s guidelines and industry best practices to ensure a job well done.
They pay close attention to the little details that make a big difference. Proper fastening, sealing, and flashing are carefully executed, ensuring a top-notch installation. After all, quality installation is the key to a roof’s longevity and optimal performance.
Once the old roofing system has been removed, your trustworthy roofing contractor will get to work installing the underlayment. This underlayment acts as a protective barrier between your roofing material and the decking material, preventing any moisture damage.
When it comes to underlayment options, you’ve got a couple of choices:
Felt underlayment: This is a tried-and-true option made of traditional asphalt-saturated felt. It’s reliable, affordable, and gets the job done effectively.
Synthetic underlayment: If you’re looking for a more advanced option, synthetic underlayment materials are worth considering. While they may come with a slightly higher price tag, they offer added benefits. They won’t rot, buckle, or crack, making them an excellent choice, especially for metal roofing projects.
But that’s not all! After the underlayment is in place, the next step is to lay the roofing paper. The contractors will carefully overlap the roofing paper towards the roof peak, providing additional protection against moisture and fire. They’ll secure the roofing paper to the roof sheathing by nailing or stapling it at least every 12 inches.
With attention to detail and professional expertise, your roofing contractors will ensure that your new roof is installed with precision and care.
Taking Care of a New Roof
One of the most important parts of any start to finish roofing project is also planning for the future of the new roof. You want to avoid roof and gutter repairs coming too soon, so ensuring that the roof is installed properly is essential. Once you’ve inspected your new roof and you’re happy that it’s sturdy and installed correctly, you should understand how to take care of it from now on. A little DIY roof maintenance can make a big difference in keeping your roof in fantastic condition for years to come. By taking a proactive approach and giving your roof some TLC, you can extend its lifespan and keep it looking its best.
Trim Trees
Imagine this: a gust of wind, a dance of tree branches, and suddenly your roof is at risk! Those seemingly harmless branches can cause significant damage. But that’s not all. They can also become a secret gateway for neighborhood critters like mischievous squirrels or curious raccoons to venture into your home uninvited. Yikes!
To keep your roof safe and your home critter-free, it’s important to take proactive measures. Make sure you trim back any overhanging branches to keep them at a safe distance from your roof. We recommend creating a cozy gap of a few feet between the trees and the exterior of your house. This way, you’re preventing any potential damage caused by those wild branches and making it harder for those sneaky critters to find their way in.
By taking a few simple steps to protect your roof, you’re also safeguarding your home from unwanted surprises and ensuring a peaceful and secure living environment. So, let’s get those trees trimmed and maintain a friendly barrier between nature and your roof!
Clean the Gutters
For a thorough start to finish roofing project, you should also sort out your gutters. Clean, free-flowing gutters that effortlessly guide water away from your home. It’s a crucial part of maintaining a healthy and happy house! When your gutters are clogged, water can’t do its job properly, leading to potential problems. But don’t worry, we’ve got you covered!
To keep your gutters in tip-top shape, it’s recommended to clean them at least twice a year. It’s a good idea to schedule this task with the changing seasons to ensure they stay clear and ready for action. If climbing up a ladder and dealing with gutter gunk doesn’t sound like your idea of fun, fear not! There’s always the option to hire a professional gutter cleaning service. They’ll handle the dirty work for you, leaving you with peace of mind and clean gutters.
Clear Away Debris
You’ll also have to clear away debris to ensure your roof won’t be exposed to elements or factors that could damage it. It’s not just about those pesky leaves in the gutters and any debris lingering on your roof can spell trouble. From snow accumulation to pesky twigs, it’s essential to keep things clean and clear to prevent issues like mold and moss growth.
When winter comes knocking with heavy snowfall, a snow rake will become your trusty sidekick. Use it to gently remove the weighty snow buildup from your roof. This simple step helps prevent any potential damage caused by excess weight and keeps your roof happy and healthy.
When it comes to leaves and twigs, a little bit of manual labor goes a long way. Grab a pair of gloves and carefully clear away any fallen foliage or debris by hand. This ensures that your roof remains free from obstructions that can lead to clogged gutters or other unwanted issues.
But what if you spot any mold, moss, or algae on your roof? Don’t fret! You can always rely on the expertise of local roof cleaners. These professionals specialize in removing these unwanted guests, leaving your roof looking spick and span.
Remember, a clean roof means a happy roof, so make cleaning part of your start to finish roofing project. By taking these simple steps, you’re protecting your roof from potential problems and maintaining its overall health. So, grab that snow rake, put on those gloves, and don’t hesitate to call in the pros when needed. Your roof will thank you for the extra care and attention!
Schedule a Yearly Roof Inspection

If you want your start to finish roofing project to be a success and avoid premature roof replacements, you need to schedule an annual roof inspection. Taking good care of your roof is important, and one way to stay ahead of any issues is through these regular roof inspections. It’s recommended to have a professional roof inspection at least once a year. This way, any potential problems can be caught and addressed as early as possible, giving you peace of mind.
Now you have a thorough start to finish roofing guide to show you the way so you can get started with replacing your roof. Understanding the start to finish roofing process when it comes to replacement and installation is crucial for a successful project. By working with professional roofing contractors and having a clear grasp of each step, you can ensure that your new roof provides the protection, durability, and peace of mind that you and your home deserve. Good luck!